🎯 Objective
By the end of this guide, you will:
- Install the Arduino IDE and add ESP32 board support through the Boards Manager URL.
- Understand what that URL actually does, so you could add support for any other board the same way.
- Select the right board and port, the two settings that cause most first-day problems.
- Upload a sketch you did not write and confirm the whole toolchain works, before any wiring can be blamed.
- Recover from an upload that will not connect, using the BOOT button.
Do this once. Every project after it just needs Upload.
1Install the Arduino IDE
Download and install the Arduino IDE from arduino.cc/en/software. Either the classic 1.8.x or the newer 2.x works.
2Add the ESP32 "Boards Manager URL"
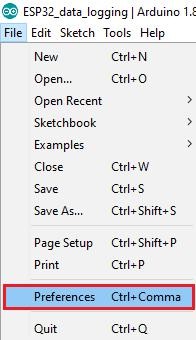
Open File → Preferences:
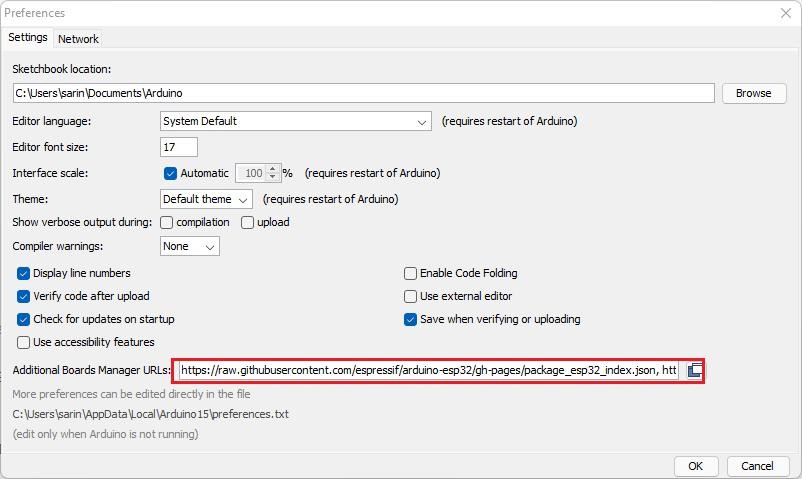
In Additional Boards Manager URLs, paste this and click OK:
https://raw.githubusercontent.com/espressif/arduino-esp32/gh-pages/package_esp32_index.json
3Install the ESP32 package
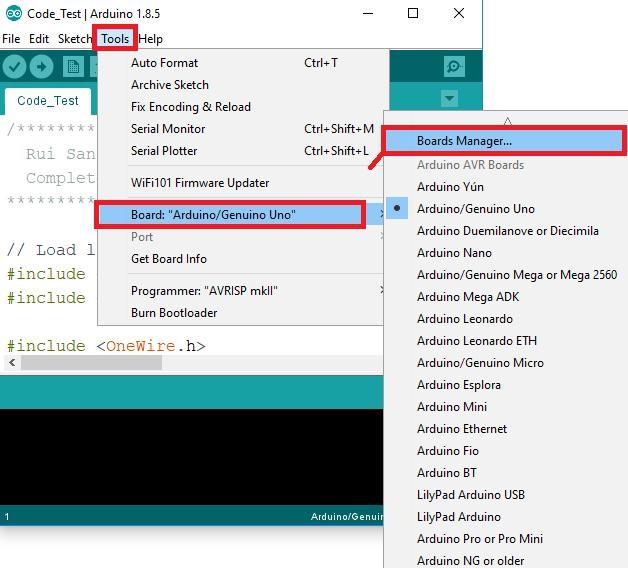
Open Tools → Board → Boards Manager…:
Search esp32, find "esp32 by Espressif Systems", click Install:
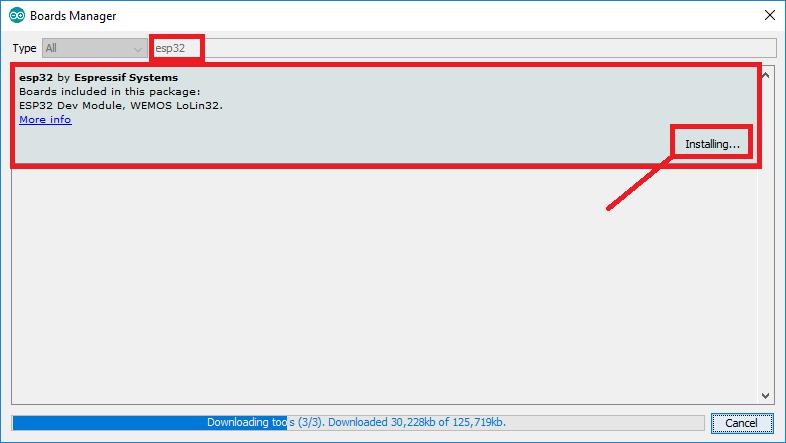
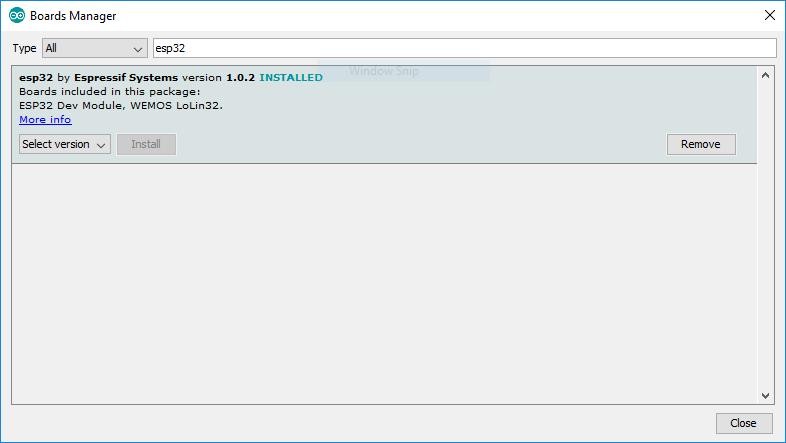
Pinning a version: that same dropdown also lets you pick an older or newer release by number instead of "latest". Do this if a tutorial you're following was written against a specific release and behaves differently on your machine; classrooms benefit from everyone pinning the same number so nobody debugs a version mismatch instead of their code.
4Select the board and port
Plug the ESP32 in with a data USB cable, then:
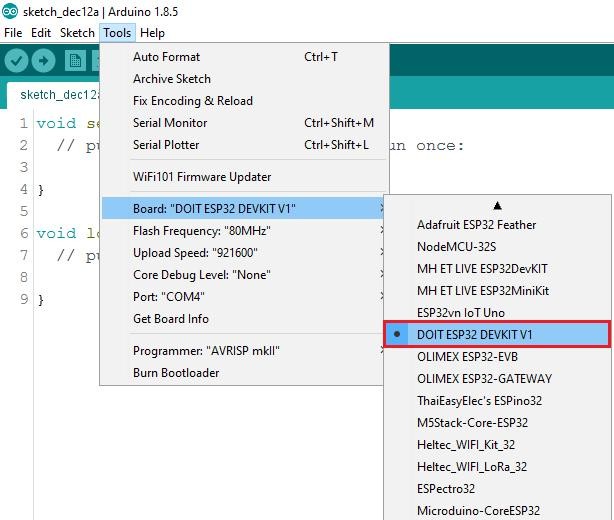
Tools → Board → choose "DOIT ESP32 DEVKIT V1":
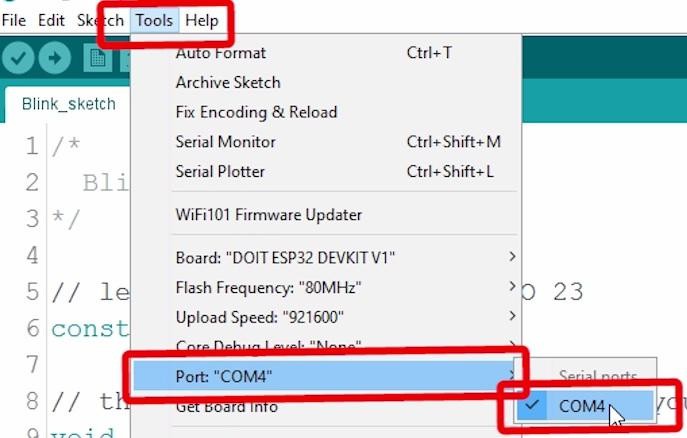
Tools → Port → choose the port (e.g. COM4 on Windows, /dev/ttyUSB0 on Linux):
Install CP2101 drivers Windows has it, including a screen-recorded walkthrough of the install. Some boards use a CH340 chip instead.5Test with the WiFiScan example
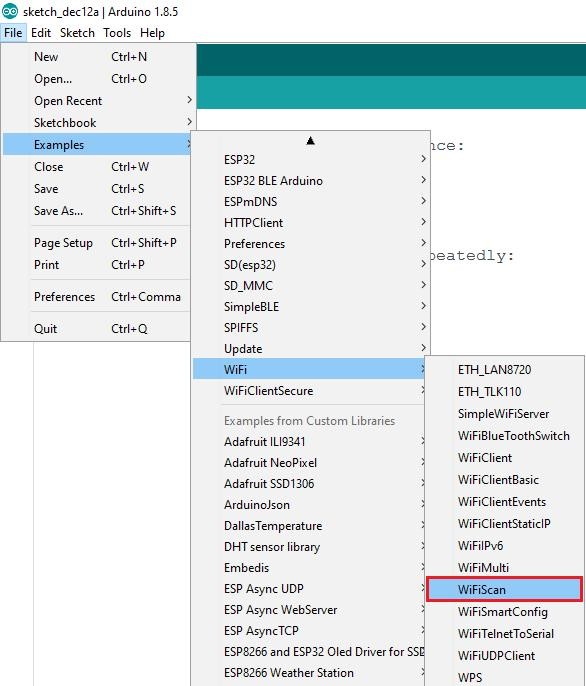
Open File → Examples → WiFi (ESP32) → WiFiScan:
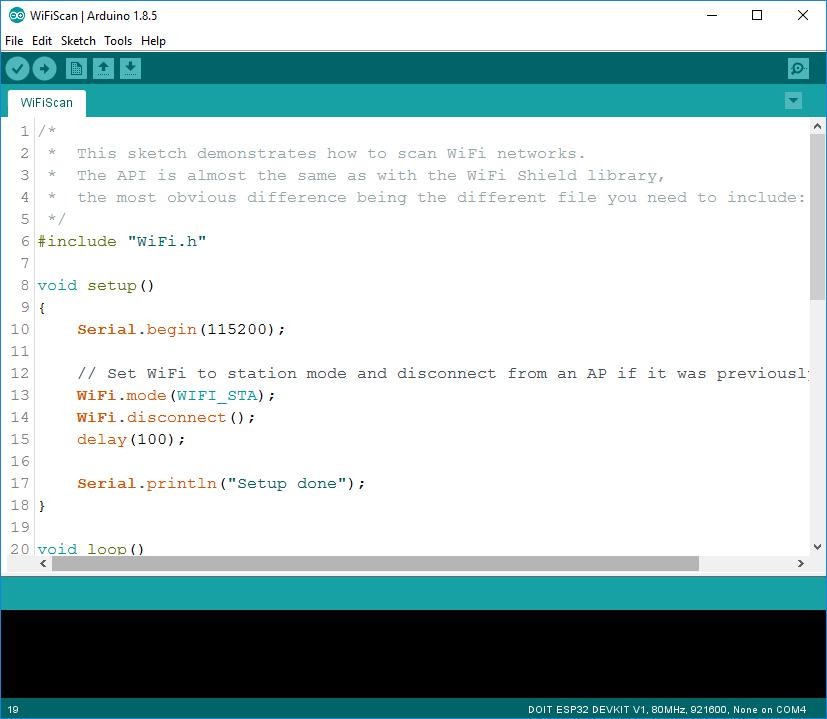
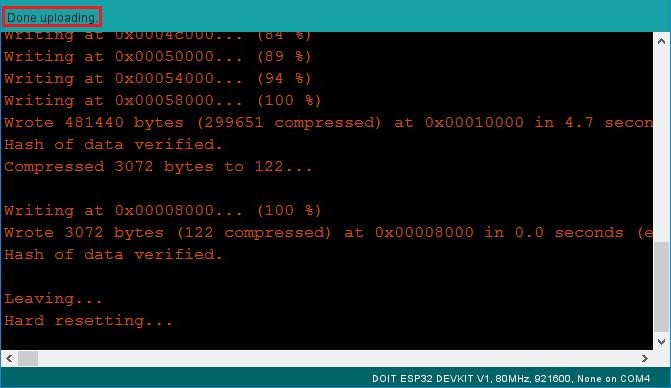
Click Upload (→) and wait for "Done uploading.":
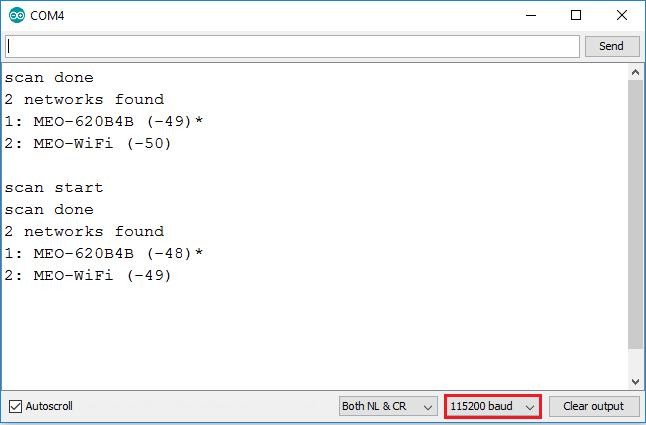
Open Serial Monitor at 115200, press EN/RESET, and watch nearby Wi‑Fi networks appear:
6If an upload won't connect
Sometimes uploading stalls with "Failed to connect to ESP32: … Connecting…":
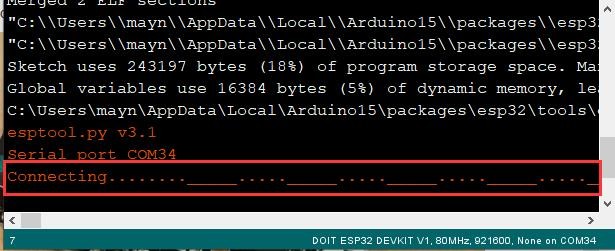
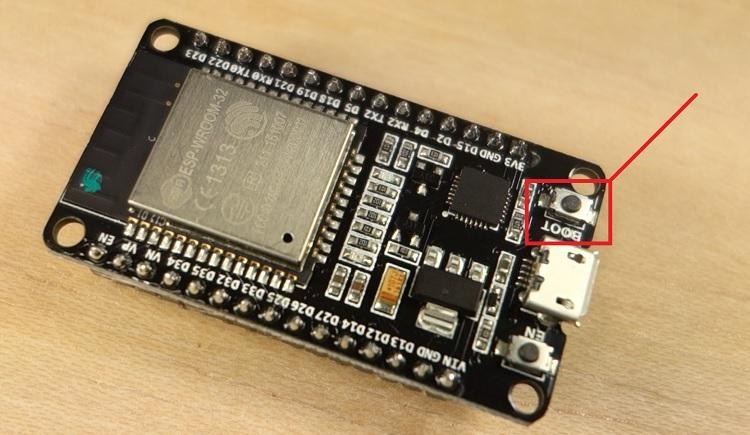
- Press and hold BOOT.
- Click Upload.
- When "Connecting…" appears, release BOOT.
- After "Done uploading", press EN/RESET to run the sketch.
7Knowledge Check
Test your understanding.
1. What baud rate should all sketches in this kit use?
2. Which ESP32 board package version is required for the Core 3.x+ PWM functions?
3. What is the correct order to install the ESP32 support?
4. If the upload gets stuck at "Connecting...", what should you do?
8Wrapping Up: What You've Learned
Setting up a toolchain is the least glamorous part of embedded work and the one that stops most people. Now that it is done, here is what actually happened:
- The Boards Manager URL is a package index. Adding Espressif's URL is what taught the IDE to compile for the ESP32 at all. Any other board family is added the same way.
- Board and port are two different settings. The board decides how your code is compiled; the port decides where it is sent. Getting either wrong produces an error that does not obviously name the cause.
- A driver may sit underneath the port. If no port appears, the USB-to-UART chip is not recognised, and no amount of correct code will help. A charge-only cable looks exactly the same.
- Uploading a known-good example first is a diagnostic, not a formality. WiFiScan proves the IDE, the driver, the cable, and the board all work, so anything that breaks later is your circuit or your code.
- The BOOT button is your manual override. Auto-reset into the bootloader usually works, and when it does not, holding BOOT at
Connecting...does the same job by hand. - 115200 baud, every time. Set it once in the Serial Monitor and stop wondering about garbage characters.
9Reminders for every project
- Baud rate is always 115200: set the Serial Monitor to match.
- Some projects need libraries (DHT, Adafruit GFX/SSD1306, ESP Async WebServer, AsyncTCP). Each such project lists exactly what to install.
- Wi‑Fi projects need your network name & password typed into the sketch before uploading.
Going further: arduino-cli, and where things actually live
If you'd rather not run a GUI, Espressif's ESP32 core installs the same way from the command line with arduino-cli:
# install the core
arduino-cli core update-index
arduino-cli core install esp32:esp32

# compile and upload a sketch
arduino-cli compile --fqbn esp32:esp32:esp32 Project_1_ESP32_Inputs_Outputs
arduino-cli upload -p /dev/ttyUSB0 --fqbn esp32:esp32:esp32 Project_1_ESP32_Inputs_Outputs
The --fqbn (fully qualified board name) esp32:esp32:esp32 is the CLI's name for the same "DOIT ESP32 DEVKIT V1" board you picked in step 4; swap the port for whatever Tools → Port showed you in the GUI.
Both the GUI and the CLI install to the same two places on disk:
- Boards/cores (the ESP32 package itself) live in your Arduino data directory (
~/.arduino15on Linux,~/Library/Arduino15on macOS,%LOCALAPPDATA%\Arduino15on Windows), not next to the IDE application. - Libraries installed via Library Manager or "Add .ZIP Library" live in your sketchbook's
libraries/folder (~/Arduino/librariesby default).
Knowing where these live is what makes "it works on my machine" debuggable: a missing or stale library is almost always a folder in one of these two places, not a setting in the IDE.
Going further: keeping credentials out of git
Every Wi‑Fi project in this kit asks you to paste your SSID, password, and sometimes a cloud token or bot key directly into the .ino file. That's fine for a solo board on your own machine, but the moment a sketch goes into version control (a shared repo, a portfolio, a pull request), those credentials go with it.
The common fix is a separate secrets.h file that never gets committed:
// secrets.h  (add this filename to .gitignore, never commit it)
#define WIFI_SSID     "your-network-name"
#define WIFI_PASSWORD "your-password"
#define UBIDOTS_TOKEN "BBUS-xxxxxxxx"
// in the main .ino
#include "secrets.h"
const char* ssid     = WIFI_SSID;
const char* password = WIFI_PASSWORD;
Add secrets.h to a .gitignore file in the sketch folder, and every credential lives in one file git never sees, while the rest of the sketch, and anything you show someone else, stays credential‑free. This kit's own projects keep credentials inline in an "EDIT THIS BLOCK" for simplicity, since a workshop board usually isn't pushed to a public repo, but it's the first habit worth building once a project leaves your machine.